
Diffuser maintenance guide
How to Clean an Essential Oil Diffuser: 7 Safe Steps
A good cleaning routine removes stale water, oil residue and scent carryover without flooding the electronics or damaging the atomizing parts. The exact liquid and method depend on the diffuser model, so the manual—not a universal vinegar recipe—has the final word.
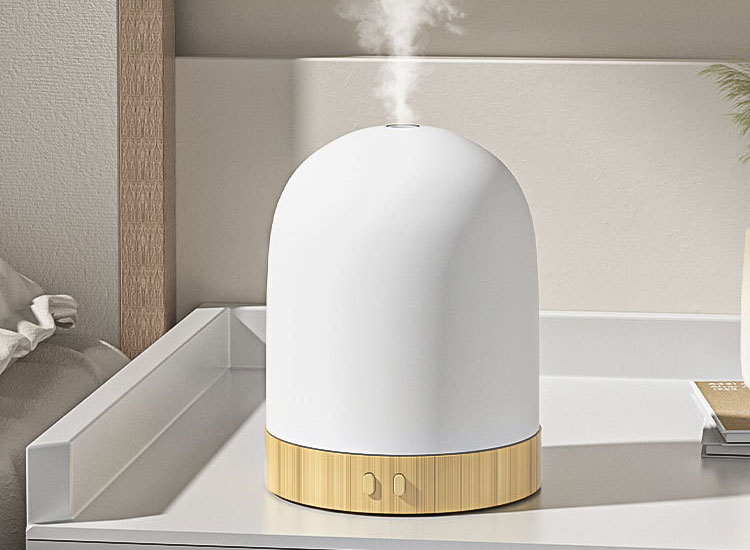
Direct answer
To clean a typical ultrasonic essential oil diffuser: switch it off and unplug it, remove the cover, empty remaining water away from the air outlet, wipe the reservoir with a soft lint-free cloth, clean the ultrasonic plate gently with the model-approved method, rinse only where the manual permits, dry every part completely and reassemble it. Never immerse the electrical base or run vinegar, alcohol or another cleaner through the unit unless the instructions specifically allow it.
How to Clean an Ultrasonic Essential Oil Diffuser
These seven steps apply to a common ultrasonic water-tank diffuser. They are deliberately conservative because tank materials, seals, air outlets, atomizing plates and permitted cleaners differ by model.
Switch off, unplug and allow the unit to stop
Disconnect the power before opening the diffuser. If it has just been operating, wait until misting and internal movement have fully stopped. Do not handle the adapter or connector with wet hands.
Remove the cover and detachable parts
Lift or turn each component in the direction shown in the manual. Keep small seals, splash guards, nozzles and decorative covers together so they can be returned to the correct position.
Empty the reservoir in the correct direction
Pour remaining water away from the air outlet, buttons and power connection. Many diffusers mark a drainage side because tipping liquid through the ventilation channel can carry water into the base.
Wipe the water tank
Use a soft, lint-free cloth or pad with the routine-cleaning method specified for the model. Remove visible oil film around the water line, corners and underside of the cover without using an abrasive sponge.
Clean the ultrasonic plate gently
The small ceramic disc is the atomizing surface. Use only a soft cotton swab or tool permitted by the manual. Do not scrape it with metal, a hard brush or a fingernail; a clean plate is useful, a scratched one considerably less so.
Rinse permitted parts and dry completely
Rinse only detachable or water-safe parts identified by the manufacturer. Wipe the tank dry and allow every component to air-dry before reassembly. Never rinse or submerge the electrical base.
Reassemble and test conservatively
Return seals, covers and splash parts to their original positions. When the manual permits a post-clean test, use the specified water and run a short cycle before adding oil. Stop immediately if the unit leaks, becomes unusually warm or behaves erratically.
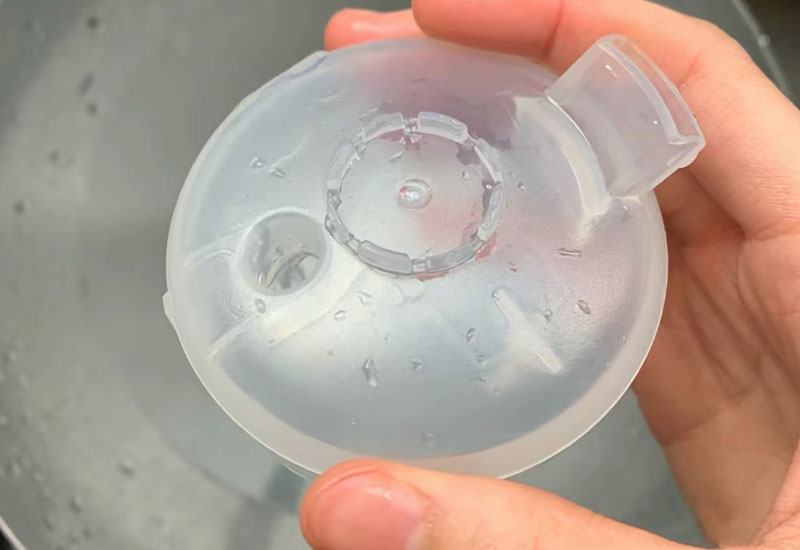
One useful distinction: a quick after-use wipe is not the same as a deep clean. Routine care removes fresh water and surface oil; a deeper model-approved clean addresses persistent film, scent carryover or reduced output.
What Do You Need to Clean a Diffuser?
Gather only the items approved for the device. A sensible basic kit may include:
- A soft lint-free cloth
- Soft cotton swabs for accessible corners
- Clean water of the type specified in the manual
- A small non-metallic cup for rinsing removable parts
- The manufacturer-approved cleaning liquid, when required
- A dry towel or protected work surface
Do not assemble a chemistry set beside the diffuser. Mixing vinegar, alcohol, soap, bleach, descaler or other household cleaners can damage materials and create residues or fumes. Use one approved method at a time.
How Often Should You Clean an Essential Oil Diffuser?
Use the manual and the condition of the device rather than one fixed calendar rule. Cleaning needs vary with operating frequency, oil quantity, oil viscosity, water quality, tank design and how long liquid remains in the reservoir.
| Cleaning trigger | Recommended response | Why it matters |
|---|---|---|
| After a normal use cycle | Empty stale water, wipe accessible surfaces and let the tank dry when the manual recommends after-use care. | Limits old-water odour and prevents the previous oil from sitting in the reservoir. |
| When changing scents | Perform a quick clean or model-approved rinse before adding a noticeably different oil. | Reduces scent carryover, especially when moving from strong spice, mint, resin or citrus profiles to a lighter fragrance. |
| Visible oil film | Use the deeper cleaning method approved for the tank and atomizing parts. | Residue can collect around the water line, cover and ceramic plate. |
| Weak or irregular mist | Switch off the unit and inspect water level, atomizing plate, airflow and assembly before assuming it has failed. | Residue is one possible cause, but power, water level and blocked air paths can produce similar symptoms. |
| Before storage or after long storage | Clean and dry the device fully before packing it; inspect it again before returning it to service. | Liquid should not remain sealed inside the unit during storage. |
| Manufacturer maintenance interval | Follow the schedule stated for the exact model, even when the diffuser still appears clean. | Waterless pumps, tubing, filters and glass atomizers may need maintenance that is not visible from outside. |
For the operating routine that precedes cleaning, see how to use an essential oil diffuser. If cleaning does not restore mist output, continue with AromaLeap’s diffuser troubleshooting guide.
How Cleaning Changes by Diffuser Type
The word “diffuser” covers several mechanisms. Before applying any cleaning liquid, identify which one you own.
| Diffuser type | Main parts to maintain | General cleaning approach | Do not assume |
|---|---|---|---|
| Ultrasonic water-tank diffuser | Reservoir, cover, ceramic atomizing plate and air path | Empty, wipe and use only the water or cleaner approved for the model. | That vinegar, alcohol, soap or a powered cleaning cycle is permitted. |
| Waterless direct-oil diffuser | Oil bottle or reservoir, pickup tube, nozzle and pump pathway | Use the manufacturer’s flushing procedure, replacement bottle or dedicated cleaning liquid where specified. | That adding water to the oil pathway is safe or effective. |
| Glass nebulizing diffuser | Glass reservoir, microtubes and atomizing nozzle | Handle the glass carefully and use the approved solvent or soak method for that design. | That the glass parts are dishwasher-safe or resistant to thermal shock. |
| Evaporative fan diffuser | Pad, wick, filter, fan intake and housing | Replace disposable scented media as directed and wipe the housing without wetting the motor. | That a stained or saturated pad can always be restored by washing. |
| Reed diffuser | Vessel, neck and reeds | Protect surfaces from spills, replace spent reeds and clean or replace the vessel according to its material. | That electronics-style cleaning instructions apply. |
| Passive ceramic or stone diffuser | Porous scenting surface and base | Follow the material-specific method and protect nearby surfaces from migrated oil. | That all absorbed oil can be removed from a porous material. |
Readers comparing mechanisms can use AromaLeap’s guide to the types of essential oil diffusers. Commercial users can also review dedicated information for waterless diffusers and nebulizing diffusers.
Can You Clean an Essential Oil Diffuser With Vinegar or Alcohol?
Sometimes—but only when the product instructions permit it. Cleaning advice differs even among reputable diffuser brands. Some models use diluted vinegar or a cleaning tablet; some specifically prohibit vinegar; some permit rubbing alcohol on a swab; and some waterless systems require a dedicated flushing solution.
Vinegar
Do not assume that a natural household product is automatically material-safe. Acidity may affect seals, coatings, finishes or internal parts, and running vinegar through the mist system may be prohibited.
Rubbing alcohol
Alcohol may be suitable for a glass nebulizer or a carefully targeted swab on some ultrasonic models, but it can also affect plastics, adhesives or coatings. Use the concentration and contact method stated by the manufacturer.
Mild soap
Soap can leave foam or fragrance residue and should not enter an ultrasonic plate, pump or tubing unless the instructions allow it. Removable decorative covers may have different care requirements from the tank.
Dedicated diffuser cleaner
A purpose-made cleaner can be appropriate for a particular brand or waterless oil pathway. “Dedicated” still does not mean universal; check material and model compatibility.
Best practice: list the exact cleaning liquid, dilution, contact time, permitted parts and rinse procedure in the user manual. “Clean regularly” is not an instruction; it is merely an optimistic suggestion wearing work clothes.
How Do You Remove Stubborn Oil Residue or an Old Scent?
Persistent film often appears around the water line, under the cover or close to the atomizing plate. Stronger-smelling or more viscous oils may also remain noticeable after a basic wipe.
- Repeat the approved routine-cleaning method rather than immediately using a stronger chemical.
- Use a soft swab on accessible residue without pressing hard on the ceramic plate or forcing material into an air channel.
- Apply the model-approved deep-cleaning liquid only to the permitted components and for the stated contact time.
- Rinse or flush exactly as instructed so cleaning residue does not become the next scent in the room.
- Replace disposable or porous parts such as pads, wicks, reeds or filters when cleaning cannot restore them.
If the diffuser still produces weak or inconsistent mist after correct cleaning, the cause may be water level, assembly, airflow, power supply or a worn atomizing component. Do not increase the oil quantity to compensate for weak mist. Check the operating instructions or contact the supplier if the permitted cleaning procedure does not resolve the issue.
What Should You Never Do When Cleaning a Diffuser?
- Do not submerge the powered base, cable, adapter or connector.
- Do not pour liquid through an air outlet or button opening.
- Do not scrape the ceramic plate with metal or a hard brush.
- Do not run a cleaner through the diffuser unless the manual permits it.
- Do not mix vinegar, alcohol, bleach, soap or other cleaners.
- Do not use boiling or very hot water unless specifically instructed.
- Do not force fragile glass tubes, seals or removable parts.
- Do not reassemble or store the diffuser while parts are still wet.
Stop using a unit that leaks into the base, smells electrically burnt, has a damaged cable, develops unusual heat or continues malfunctioning after the permitted checks. See the separate essential oil diffuser safety guide for broader operating precautions.
For brands, retailers and hospitality buyers
Cleanability Should Be Evaluated Before a Bulk Diffuser Order
A diffuser can perform well in a sample test and still generate customer complaints if the reservoir is awkward to drain, the oil path is inaccessible or the manual provides vague maintenance instructions. Cleanability belongs in product evaluation, packaging review and quality control.
- Clear drainage direction away from the air outlet
- Easy access to the tank and atomizing surface
- Removable parts that return to one obvious position
- Materials tested with the intended oil or fragrance formulation
- Defined cleaning liquid and dilution where applicable
- Illustrated routine and deep-cleaning instructions
- Replacement bottles, tubes, nozzles, pads or glass parts when relevant
- Troubleshooting that separates residue from electrical faults
- Destination-language warnings and maintenance text
- Sample testing after repeated use and scent changes
Buyers can compare AromaLeap’s wholesale oil diffuser range, review ultrasonic diffuser options and examine the factory’s diffuser quality-control process. The final manual and cleaning method should be approved against the exact model and intended oil before mass production.
Continue Your Diffuser Research
Frequently Asked Questions
How do you clean an essential oil diffuser?
For a typical ultrasonic diffuser, unplug it, remove the cover, empty water away from the air outlet, wipe the reservoir, clean the ceramic plate gently with the model-approved method, dry every part and reassemble it. Follow the exact manual because permitted cleaners and rinse methods vary.
How often should an essential oil diffuser be cleaned?
Follow the manufacturer’s interval and clean when there is stale water, visible oil film, scent carryover, reduced mist, a scent change or storage. Frequent users may need routine care more often than occasional users, but no single schedule suits every diffuser.
Can you clean a diffuser with vinegar?
Only when the instructions for that diffuser permit vinegar and state the dilution and procedure. Some manufacturers use diluted vinegar, while others specifically advise against it. Never treat vinegar as a universal diffuser cleaner.
Can you clean an essential oil diffuser without vinegar?
Yes. Routine care may use a soft cloth and the specified water, while deeper cleaning may use rubbing alcohol, a cleaning tablet or a dedicated diffuser cleaner when approved for the model. The manual should identify the correct method.
Can rubbing alcohol be used to clean a diffuser?
Alcohol may be permitted for certain glass nebulizers or for targeted cleaning with a swab, but it may affect some plastics, coatings or adhesives. Use only the concentration, contact area and rinse process stated by the manufacturer.
How do you remove essential oil residue from a diffuser?
Repeat the approved cleaning method, use a soft swab on accessible film and apply the model-approved deeper cleaner if residue remains. Do not scrape the atomizing plate or use stronger chemicals merely because a basic wipe did not work.
How do you clean a waterless essential oil diffuser?
Do not add water unless the manual specifically requires it. Waterless systems commonly need the oil bottle, pickup tube, nozzle or pump pathway flushed with a compatible cleaning liquid or replacement bottle according to the manufacturer’s procedure.
Can you submerge an essential oil diffuser in water?
No. The electrical base, cable, adapter and connectors should not be submerged. Only removable water-safe components identified in the manual should be rinsed or washed, and they should be completely dry before reassembly.
Developing a Diffuser Range That Is Easy to Maintain?
Share the intended diffuser mechanism, oil formulation, materials, target market, packaging, manual languages and estimated quantity. AromaLeap can help shortlist models and define model-specific operation, cleaning and quality-review requirements.
Discuss Your Diffuser ProjectGeneral maintenance guidance only. The instructions supplied with the exact diffuser and aromatic liquid take priority.